
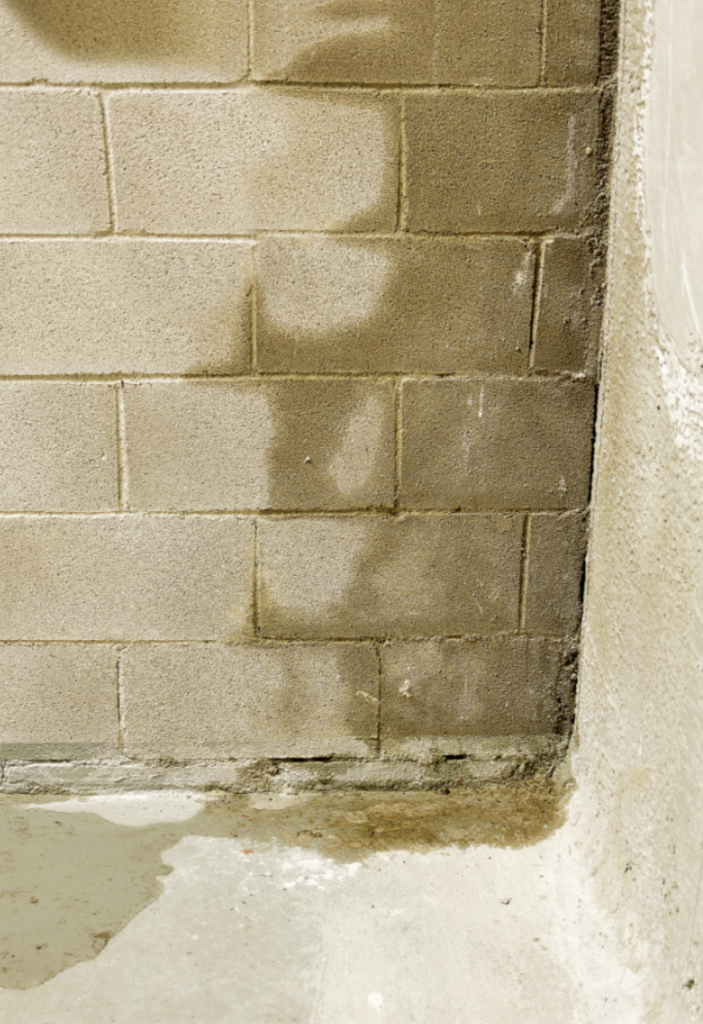
So, your basement’s flooded? Yeah, that’s a pain and maybe a hit to your wallet, but don’t panic just yet. The expense depends on what’s causing the flood, so let’s get to the bottom of it before you start throwing money at the problem. Sometimes it’s a quick, budget-friendly fix. This guide will walk you through various flooded basement solutions and repairs, including resolving the immediate mess, and preventing it from happening again.
The Immediate Flooded Basement Solutions:
Step 1: Staying Safe
Safety first! Before wading into a watery basement, kill the power in your house. If you can’t reach the circuit breaker safely, call an electrician or your utility company to take care of it. Avoid any electrical equipment in the basement to steer clear of electrocution risks.
Step 2: Getting Rid of the Water
Once you’re sure the power’s off, it’s time to tackle the water. Check for any drains and clear them out. If it’s just a couple of inches of water, a wet vac should do the trick. If it’s deeper, give Standard Water Control a ring to help out. After most of the water’s gone, throw down some towels to soak up the rest, then crank up some fans and dehumidifiers. Keep those dehumidifiers about 6-8 inches from the walls.
Step 3: Deciding What to Keep or Toss
While the basement dries, sort through your stuff. Save what you can and chuck anything that got soaked and could trap moisture, like drywall and cardboard. Keeping those around could lead to mold and mildew.
Step 4: Cleaning Up
For cleaning, hit the hard surfaces with a mix of water and bleach (one cup of bleach per gallon of water) to fend off mold and mildew.
Finding the Source of Basement Flooding
Check Outside First
Before diving into the basement, take a look around your house. Are the gutters and downspouts clear and doing their job? Make sure they’re debris-free and extend at least six feet from your foundation. Also, check if your house slopes away from the foundation by at least one inch per foot for six feet. If these aren’t right, that might be your flooding culprit. But don’t stop there; head inside to confirm.
Basement Walls and Floor
Concrete walls can leak, so look for damp spots, especially near pipes and windows. Check for cracks or holes in both walls and floors. For concrete-block walls, look for missing mortar or holes. In poured-concrete walls, examine the wall-ties for any issues.
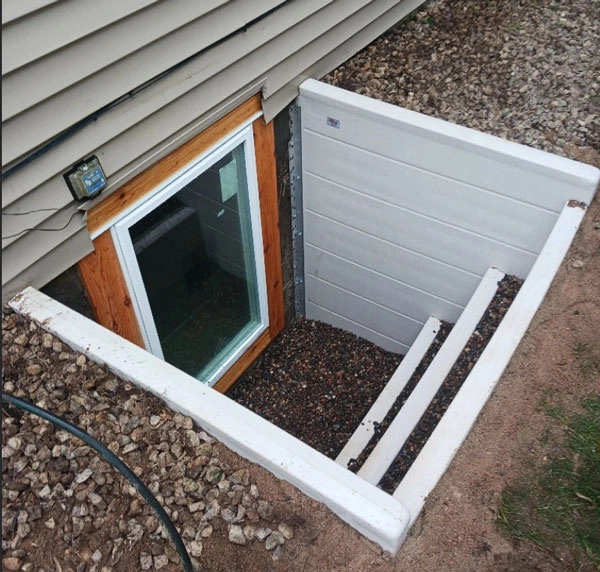
Window Wells
Your window well could be the problem too. Pooling water here often means trouble. This might be due to poor upkeep, incorrect installation, or a bad fit for the window or cover. Make sure the drain is clear of debris.
Drain Tile
If your basement has drain tile, ensure it’s not blocked or broken. No drain tile? You might need to consider getting it installed when waterproofing your basement.
Sump Pump Check
A faulty sump pump can lead to flooding. Check the valve for proper fitting and debris, making sure it points away from the pump. Also, ensure the float is clean and free of debris.t cover size. Check the drain as well. It should be free of any debris or gravel.
How to Waterproof Your Basement
Wondering if you can fix a leaky basement from the inside? The answer is, “Yes!” Once you identify the source of the flooding, it’s time to dive into some solutions. While Standard Water is all about long-term peace of mind and doesn’t typically recommend DIY waterproofing, we get that sometimes you just want to give it a shot yourself. So, here’s some DIY guidance along with our recommended solutions.
Fixing Wet Basement Walls and Floors
First things first, ensure your gutters are channeling water away from your house and that the ground is sloped correctly to prevent water from heading toward your basement walls. That’s just the beginning. Got cracks in your foundation? You might want to consider installing Carbon Fiber Straps to stop any further wall bowing. If it’s too bowed, you might need piering and possibly a structural engineer.
As for carbon fiber straps, Standard Water can install them in just a day, and it’s a non-invasive process. Here’s our step-by-step:
- Check if urethane or epoxy is the right choice based on the crack’s severity.
- Grind down the wall to ensure proper adhesion.
- Drill holes in the crack for the repair material ports.
- Spread epoxy over the repair area to keep the material in the crack.
And there you have it! With these steps, you’re on your way to a drier, more secure basement! Sometimes homeowners will think that by injecting a crack with foam or epoxy that they can keep water out of the basement. This may work in the short term, but a system needs to be put in place to control the water. Typically this involves installing interior drain tile and a sump pump. It may also involve installing delta board on the inside of the basement walls so that should water come through a crack, it can be directed into the drain tile.
How to Fix Your Window Well
If you’re up for some DIY, keeping your window well in good shape might just prevent flooding. Simply clean the drain and gravel regularly. If there’s a lot of muck in the gravel, you can either wash it and put it back or replace it entirely.
For a more robust solution, Standard Water offers Egress Window installation. This includes not just the window well, but also a well cover and rock drainage around, under, and inside the well to keep water out. Plus, we can install Egress Windows in just one day with minimal disruption to your home:
- Hand-excavate the area to avoid any home damage.
- Cut out the window hole.
- Secure the window and fill the area with gravel for proper drainage.
- If you have our drain tile system, we’ll connect it to a pipe in the window well.
Interested? Get in touch for a free consultation and quote. We’re the leading egress window company in Minneapolis and nearby areas, including western WI!
Fixing Your Drain Tile: A DIY Guide
Got a clogged drain tile? No worries! Just remove the obstruction, and you’re good to go. But if it’s collapsed, it’s time to call in a contractor.
For long-term water prevention in your basement, Standard Water recommends using a rigid PVC interior drain tile system. Curious about the benefits? Check out our blog on Why You Should Choose PVC Drain Tile.
Here’s a quick look at the installation process:
- Dig trenches.
- Drain water from foundation blocks.
- Install rigid PVC pipe.
- Add our patented drainage technology.
- Set up a moisture barrier.
- Install the Superior Sump Pump System and cement over the tile.
With quick installation and careful attention to your home, we’ve got you covered!
Sump Pump
For the DIY solution, if you’ve cleared all debris and it’s still not working, you need to replace the sump pump.
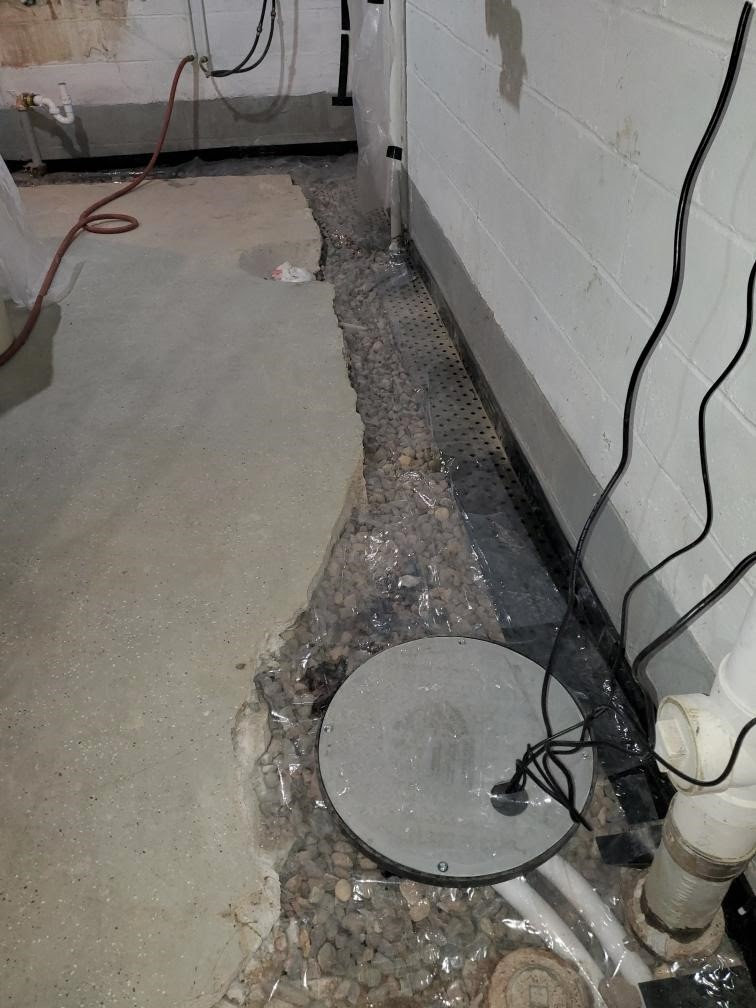
Standard Water’s got you covered with our Superior Sump Pump System, one of the top basement waterproofing products out there. We usually set up two discharge pipes, so you can easily add a battery backup pump system now or whenever you want.
Tired of dealing with a flooded basement?
We get it, basement floods are a hassle. Luckily, there are plenty of causes and solutions. Whichever fix you go for, fingers crossed you won’t have to face it again! If the problem isn’t your gutters, downspouts, or home slope, calling in the pros is your best bet. Standard Water, a Minneapolis waterproofing company, has been keeping basements dry and homeowners happy for over 45 years. Why not get a free consultation or quote today?
Flooded Basement FAQs
How Much Does Basement Waterproofing Cost?
Basement waterproofing costs vary significantly depending on the size of the basement, the source of the water, the condition of the foundation, and the waterproofing system required. Minor repairs may cost substantially less than a complete interior drainage system or exterior waterproofing project. The best way to determine the cost is to identify the source of the water and have the basement professionally evaluated before choosing a solution.
Can You Waterproof a Basement From the Outside?
Yes. Exterior basement waterproofing is one option for preventing water from reaching the foundation in the first place. It can involve excavating around the foundation, addressing drainage issues, and installing a waterproof membrane or other protective system. Whether exterior waterproofing is appropriate depends on the source of the water, the foundation’s condition, site conditions, and accessibility. An inspection can help determine whether an exterior solution or an interior drainage system is the better fit.
How Long Does Basement Waterproofing Take?
The time required for basement waterproofing depends on the size of the basement, the extent of the water problem, the waterproofing method, and whether additional repairs are needed. Smaller repairs may be completed quickly, while projects involving interior drain tile, sump pump installation, foundation repairs, or exterior excavation can take longer. A professional evaluation can provide a more accurate timeline based on the scope of work.
How Long Does It Take for a Flooded Basement to Dry?
A flooded basement can take anywhere from several hours to several days to dry, depending on how much water entered the space, the materials affected, temperature, humidity, and how quickly water is removed. Fans and dehumidifiers can help accelerate the drying process, but porous materials such as drywall, insulation, carpeting, and cardboard may retain moisture and need to be removed if they cannot be thoroughly dried. If moisture remains after the visible water is gone, a professional assessment can help determine whether additional drying or remediation is necessary.